Equipment:
-Supra colour palette
-Bourjois bronzing mousse
-Spatulas
-Non-waterproof mascara
-Bowl of water
-Disposable mascara wands
-Liquid latex in bowl
-Tissue paper
-Kitchen towel
-Cotton buds
-Virgin coconut oil
-Thick hand band
-Egg whites
-Small fluffy brush
-Small angled brush
-Foundation palette
-Blood paste
-Grey jumper
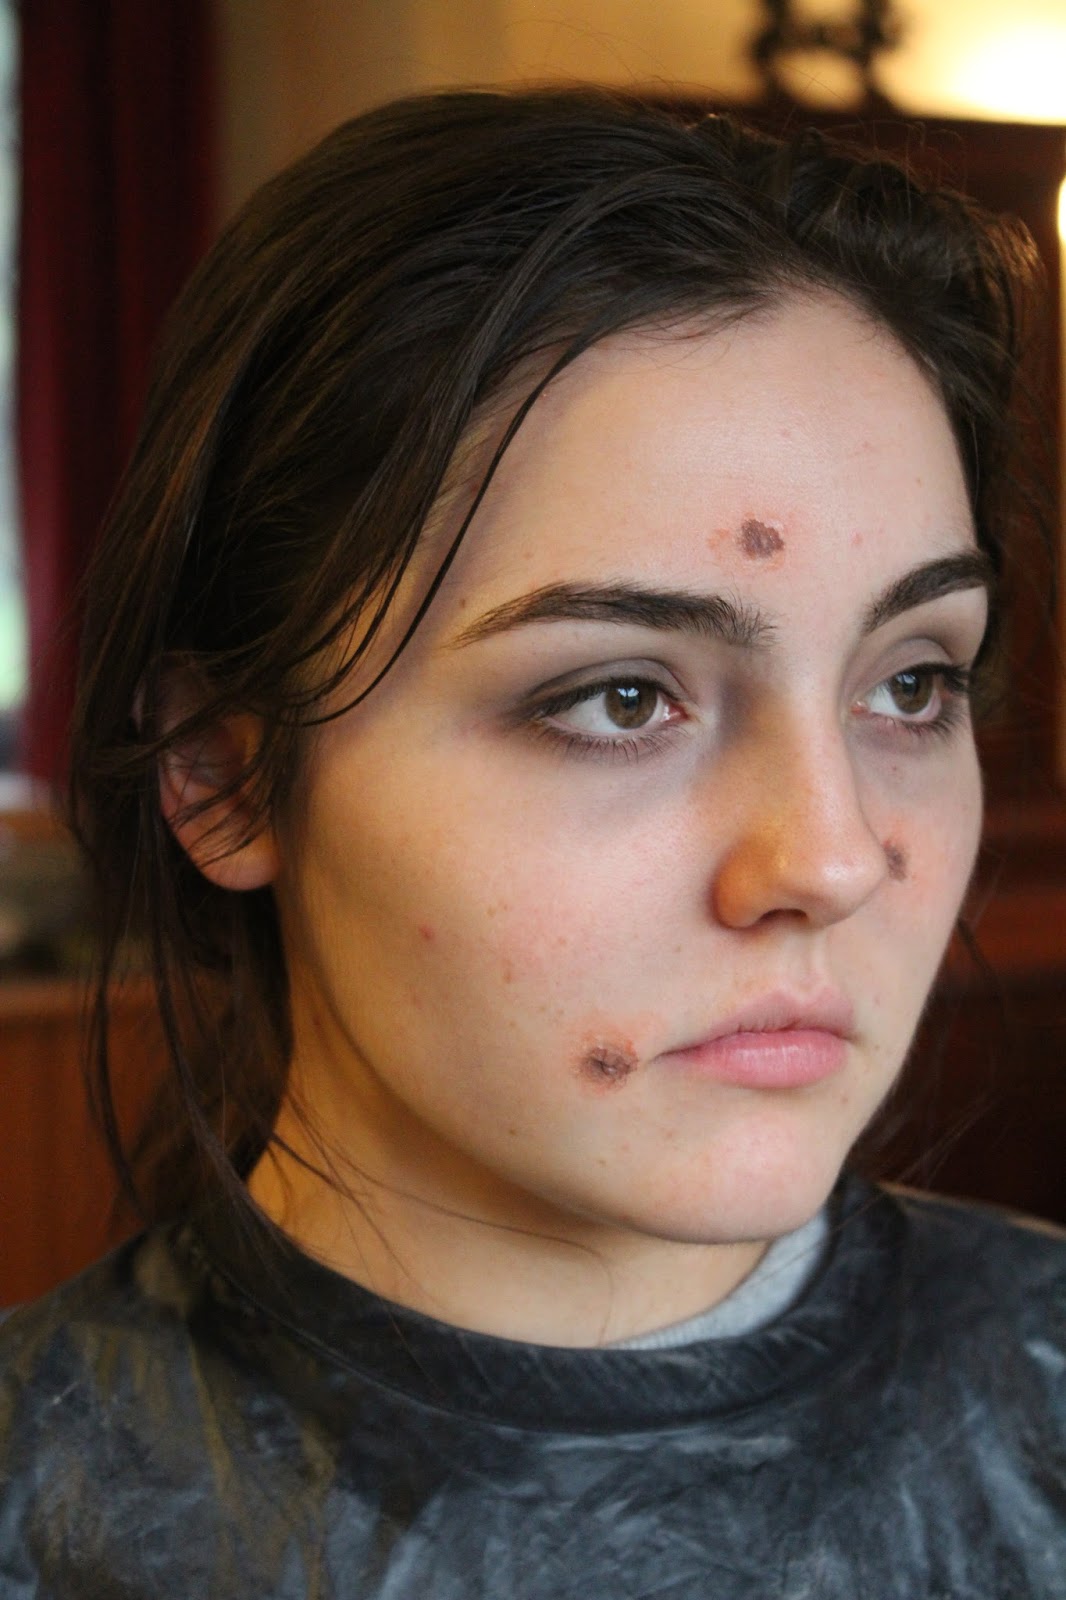
 |
| Before makeup application. |
1. I first mixed together some brown bronzing mousse (the one from Bourjois) with some black and white supra colour. I thought that the brown colour was too warm on its own to I added the black and white to give it more of a grey tone.
2. I applied a tiny bit of this under my cheekbones to make it look like a natural shadow was falling underneath. I blended this out really well with my fingers to make it look as realistic as possible.
3. I then added some coming down from the contour to the outer sides of my chin to make me look more gaunt. I, again, blended this in very well so that it didn't look too obvious.
4. I then added some of the same grey toned brown at the sides of my temples to make my forehead look slimmer. I blended this into my hair line very well.
5. I then added some of this grey toned brown from the beginning of the eyebrow down the sides of the bridge of my nose to make it look smaller and to make my eyes look more sunken in.


7. I added some of this same colour under my eyes, where the darkest part of my bags were and blended it in to make it look very natural. I also added this in my inner corners to make the eyes look very tired.
8. I added some of this into the sockets of my eyes to make my eyes look more tired and sunken in. I blended a very small amount of this on the eyelids to add to the overall dark effect.


9. I added a tiny bit of purple and a small bit of green under the eyes in the areas where these colours were naturally showing through. I will accentuate my model's natural shadows under her eyes so this colouring may vary slightly.


11. I applied a coat of non-waterproof mascara to the top and bottom eyelashes.
12. Apply some liquid latex to the area where you want the scab to be, with a spatular or cotton bud.
13. Rip some tissue in half and then take a small section of that half, screw it up, and press it into the liquid latex.


19. I made my finger slightly wet and then rubbed the mascara on my eyes until I felt it all start to smudge everywhere.
20. I roughly cleaned up the edges with my fingers so that the smudged mascara was more concentrated around her eyes.

21. Once the liquid latex has fully dried, take some egg whites on a cotton bud and apply it on top of the liquid latex.
22. Once the egg whites have fully dried, scratch at the scab with your nails to loosen some of the egg whites and make it look flakey and rough.
23. Smudge some red supra colour around the edges with your finger and blend very well.
24. Mix some blue, purple, red and yellow supra colour together to make a red/brown colour and, using a small angled brush, apply this over all the white tissue showing.


 25. Add some more red to this mixture and dab it onto the scab in random patches.
26. Take a tiny bit of black on your small angled brush and dab it into the crevices/dents in the scab to give it more dimension.
27. Add some light coloured foundation to the lips with a fluffy brush to mute the colour of the natural lips slightly.
28. Add some yellow into the red/brown mixture and dab some with the small angled brush on some of the high points of the scabs, again adding dimension.


29. Add some blood paste to one or two of the scabs with a cotton bud, to make it look like she has just picked at it and it is bleeding slightly.


30. I then put on the baggy grey top to complete the look. I decided on my character wearing this very baggy, light grey jumper because it looks very loose fitting and scruffy and I like that the material is so thin because it makes it look more like she is wasting away underneath.


Final Look


Close-ups of the scabs:


I am so excited by how my whole look has come together! I really like that I didn't use any foundation because the skin looks so natural and imperfect. I really like how dark and sunken in the eyes look and how they make her look so tired. I am really pleased that I only used creams because I was able to blend the contours and under eye bags really easily and made them look natural. I like how I have used a grey toned contour because it doesn't look like I've purposefully applied bronzer, it just looks like shadows being cast on the face. I am really pleased with how the scabs came out because I think they look very realistic and I like the more subtle redness around them. I think it's effective how I have added blood paste to just one of the scabs because you can see the contrast between the dry and bloody ones and it is clear that the character still picks at them. I think the greasy hair looks very effective and makes her look very dirty and like she doesn't look after herself properly. I am also very happy with the baggy grey jumper because it looks very similar to one I saw on the documentary I watched so I know that it is realistic.
I am not sure how I am going to position my model in the final images yet, but I know that the human bite mark is going to be positioned on her upper, lower arm so that needs to be on show. I am very nervous about only learning how to remove my prosthetic from my mould on the day of my assessment, just incase it goes wrong, or I rip it, or I'm not happy with how it has come out. I always like to be very prepared for any of my assessments so this is making me more nervous as I was not able to practice this part.
3. I then added some coming down from the contour to the outer sides of my chin to make me look more gaunt. I, again, blended this in very well so that it didn't look too obvious.
4. I then added some of the same grey toned brown at the sides of my temples to make my forehead look slimmer. I blended this into my hair line very well.
5. I then added some of this grey toned brown from the beginning of the eyebrow down the sides of the bridge of my nose to make it look smaller and to make my eyes look more sunken in.
6. I added a very small amount of this cream colour under my smile lines to make the skin look less plump and more like it was sagging down.


7. I added some of this same colour under my eyes, where the darkest part of my bags were and blended it in to make it look very natural. I also added this in my inner corners to make the eyes look very tired.
8. I added some of this into the sockets of my eyes to make my eyes look more tired and sunken in. I blended a very small amount of this on the eyelids to add to the overall dark effect.


9. I added a tiny bit of purple and a small bit of green under the eyes in the areas where these colours were naturally showing through. I will accentuate my model's natural shadows under her eyes so this colouring may vary slightly.
10. I added some red supra colour on the outer part of the lower lash line and blended it in very well to accentuate the red that was already there.


11. I applied a coat of non-waterproof mascara to the top and bottom eyelashes.
12. Apply some liquid latex to the area where you want the scab to be, with a spatular or cotton bud.
13. Rip some tissue in half and then take a small section of that half, screw it up, and press it into the liquid latex.
14. Apply one more coat of liquid latex over the top to seal down any edges and blend into the skin.


15. (Whilst the liquid latex is drying) I made sure I didn’t brush my hair before starting to style the hair. I warmed up some virgin coconut oil in my hands and brushed it through the roots of my hair with my fingers. I brushed it back far enough for it to look naturally greasy, but stopped just before the hair hit where the pony tail would be.
 |
| This is the virgin coconut oil I used. |

16. I gathered my hair at the back of my head, in a low ponytail and secured it with a hand band.
17. I then loosened the hair band slightly and pulled some hairs out. I didn’t want it to look too neat or precise so I just tugged at my hair and let bit fall out naturally.
18. I pulled out some strands at the front of the hair to give a messier look.


20. I roughly cleaned up the edges with my fingers so that the smudged mascara was more concentrated around her eyes.

22. Once the egg whites have fully dried, scratch at the scab with your nails to loosen some of the egg whites and make it look flakey and rough.
23. Smudge some red supra colour around the edges with your finger and blend very well.
24. Mix some blue, purple, red and yellow supra colour together to make a red/brown colour and, using a small angled brush, apply this over all the white tissue showing.


26. Take a tiny bit of black on your small angled brush and dab it into the crevices/dents in the scab to give it more dimension.
27. Add some light coloured foundation to the lips with a fluffy brush to mute the colour of the natural lips slightly.
28. Add some yellow into the red/brown mixture and dab some with the small angled brush on some of the high points of the scabs, again adding dimension.


29. Add some blood paste to one or two of the scabs with a cotton bud, to make it look like she has just picked at it and it is bleeding slightly.


30. I then put on the baggy grey top to complete the look. I decided on my character wearing this very baggy, light grey jumper because it looks very loose fitting and scruffy and I like that the material is so thin because it makes it look more like she is wasting away underneath.


Final Look


Close-ups of the scabs:


I am so excited by how my whole look has come together! I really like that I didn't use any foundation because the skin looks so natural and imperfect. I really like how dark and sunken in the eyes look and how they make her look so tired. I am really pleased that I only used creams because I was able to blend the contours and under eye bags really easily and made them look natural. I like how I have used a grey toned contour because it doesn't look like I've purposefully applied bronzer, it just looks like shadows being cast on the face. I am really pleased with how the scabs came out because I think they look very realistic and I like the more subtle redness around them. I think it's effective how I have added blood paste to just one of the scabs because you can see the contrast between the dry and bloody ones and it is clear that the character still picks at them. I think the greasy hair looks very effective and makes her look very dirty and like she doesn't look after herself properly. I am also very happy with the baggy grey jumper because it looks very similar to one I saw on the documentary I watched so I know that it is realistic.
I am not sure how I am going to position my model in the final images yet, but I know that the human bite mark is going to be positioned on her upper, lower arm so that needs to be on show. I am very nervous about only learning how to remove my prosthetic from my mould on the day of my assessment, just incase it goes wrong, or I rip it, or I'm not happy with how it has come out. I always like to be very prepared for any of my assessments so this is making me more nervous as I was not able to practice this part.
No comments:
Post a Comment